Month: April 2017
What should you know before you 3D scan your aircraft part...
In my first blog post of “Delivering a True Time Savings: 3D Laser Scanning for Aviation.” I touched on what a portable 3D laser scanner is, the process for 3D scanning, but only briefly how it compares to its other scanning counterparts. As I prepared for my next post I realized that just as important in understanding the scanning process is grasping the differences between the various types of 3D scanners on the market. Yes, technically they all output 3D data representing the form of a real-world object, however, it’s what that data will be used for that sets the stage for what type of scanner to use. By not using the correct scanner the returning data may prove useless because it does not contain the level of accuracy, or it is physically unable to scan what’s necessary for the project’s goals. In this post we’ll look at the various scanner types, their pros and cons, and finally our preference for a majority of aviation applications.
To contact or not to contact?
The main classification of 3D scanners fall into two categories, contact and non-contact. These category titles are self-descriptive so I will spend more time delving into the types of scanners that are within these two categories.
Contact:
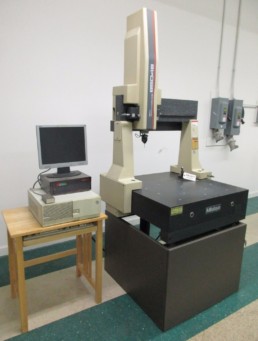
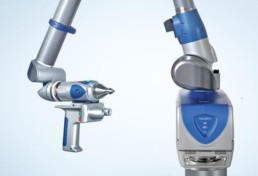
Typically defined as CMM (Coordinate Measuring Machines), these machines record positions in the X, Y, and Z coordinates utilizing a mechanical probe. Early machines have become antiquated due to their operators requirements to move the machines manually and results proving suspect due to the different amounts of pressure applied during probing or touching the object. The process of recording positions is also very time-consuming because of the quantity of points necessary to accurately build three dimensional data. In addition to the scan time consumption, physical constraints are realized because of the table or bed that the part must be contained within. Some of those issues have been alleviated with the introduction of jointed arms that allow the probe to articulate in multiple directions. However, the probe is still at the limitations of the full extension of the arm that is typically fastened to a table or other base structure. It should be mentioned that newer models of probing-type scanners have eliminated the need for touching the part. This has increased the accuracy and speed of data acquisition.
While it may seem that these scanners are altogether outdated, that is not true. Like many tools, there are many that produce similar results, however, it’s the requirements of the project that typically select the best tool for the job. In the case of CMM, objects that are required to be verified in a consistent manner and in a controlled environment are well-suited to this type of scanning. The best example is in manufacturing quality assurance settings where products are constantly checked for tolerance against CAD design models and specifications. In addition, the latest technology in CMM has provided for handheld portable devices that lend themselves well to production floor conditions.
Non-contact:
Even the title lends itself to describe what sounds like better technology doesn’t it? These types of scanners own the most advanced and preferred scanning features. What these types of scanners utilize are some kind of light, laser, or even radiation that detects an object’s features’ reflection back to the scanner, digitally recreating a 3D object within the scanner’s line of sight. In this category, I will compare four major scanner types: 1. Time of flight 2. Structured light 3. Handheld laser (triangulation) and, 4. Volumetric or passive.
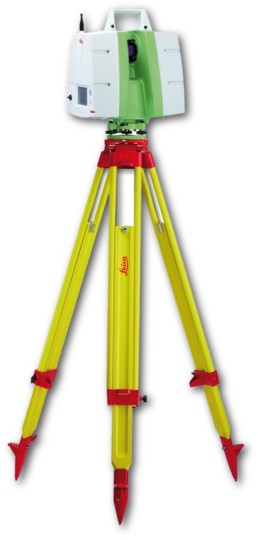
1. Time of flight scanners use a laser light that is emitted from its position. An internal range-finder records the distance of a surface by timing the lasers round-trip time of flight. Due to this time measurement, these scanners accuracy depend on how precisely they can measure time. Output is typically in the form of a “point cloud”, typically millions of points that assemble in relation to their measurement through the scan. The data’s appearance resembles a cloud in the sense that the points are floating and are not faces or surfaces. These types of scanners typically benefit the architecture, construction, and building / facility management industries because of the vast amount of space that they can capture.
Their major disadvantage is a lack of high accuracy due to timing the high speed of light over this large distance. While these tolerances are acceptable for large scale measurement, they fall short for the precision necessary on parts fabricated for an aircraft. In addition, due to the process of data capturing, any motion in the subject or scanner will distort and degrade accuracy. This means using large tripod mounted platforms that limit line of sight and stopping any work in and or around the scan area can be cost prohibitive if other work is being performed in the vicinity.
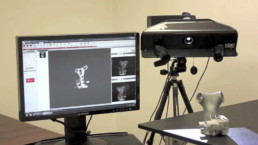
2. Using a reliable light source, structured light scanners emit a unique pattern of light on a subject. Internal cameras slightly offset from the light source capture the shape of the pattern and measure the distance of every view point on the object. Advantages of structured light 3D scanners include data acquisition speed and precision because they can scan multiple points at once and build data as a triangulated mesh model. These polygon mesh models are advantageous for export to CAD software that uses the mesh as reference to build parametric, editable surface models. These CAD models are what are used for final fabrication efforts.
The disadvantage with these types of scanners is the necessity to mount on a tripod because of the light projector and camera’s relatively large and heavy physical size. In addition, line of site is then limited due to the static mounting. Often, rotary tables are required as an accessory to help automate the scanning process. These efforts require more setup time and don’t lend themselves well to environments outside of an office per se.
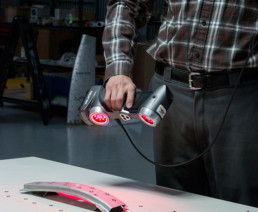
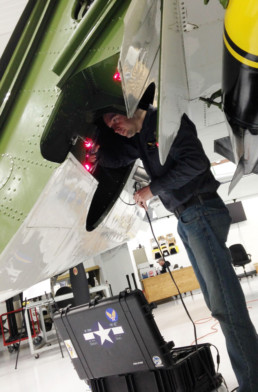
3. Handheld laser triangulation type scanners are certainly the most revolutionary in the field of 3D scanning. In particular because of their portability, speed, and accuracy. Portable laser scanners create 3D data by emitting a laser(s) that duplicates the object by traveling across its surface. Because the internal coordinate system is defined by characteristics or by positioning targets on or around the object, the object is not subject to static placement or vibrations during scanning. In fact, often the part can be held in one hand to provide line of sight while the other hand moves the scanner! Similar to structured light sources, laser scanners generate polygon mesh 3D data that is excellent reference for downstream CAD workflow. Laser scanning can be considered for NDT (non-destructive testing) efforts because the lasers are not physically touching the part.
If there is a disadvantage to handheld laser scanners that use positioning targets, it is the time involved in applying them. If the application is a wing or fuselage and the entire area is to be scanned, a large portion of setup time can be involved in randomly applying the targets and then removing them if necessary. There are laser scanners that self-coordinate off of the the part’s characteristics (not requiring positioning targets), however, you are then held to the constrictions of keeping the subject stationary and eliminating movement that could affect the accuracy.
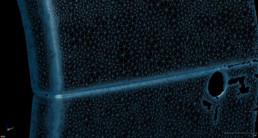
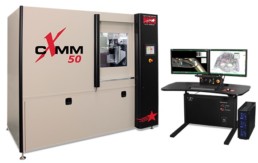
4. Finally, the last category of scanners to mention is volumetric types. These scanners are referred to as volumetric types because they actually scan the volume of a subject and are able to “see inside” or through the part. Computed tomography, more often referred to as a CT scan, is common in the medical industry for visualization of the body’s internals. However, for inspection of internal makeup, fatigue, or stress of a part, this can be a very useful type of scan. NDT services typically provide this type of scanning since it also not physically touching the part to achieve data that is rich in the details that are not visible to the naked eye. An additional subtype is phased array which is ultrasonic scanning used for a component’s internal failure detection.
Because this data can be difficult to interpret and uses equipment that takes longer specialized training, it is usually reserved for unique parts that could result in critical failure situations. The equipment that performs these types of scans are the most complex and are operated by more experienced individuals so the costs for results are delivered at a premium. If your application does not require an internal inspection you would most likely overpay for the data delivered by these volumetric types as opposed to the previously mentioned scanner types.
Click images to view larger.
To contact or not to contact?
I assembled this quick table to visually display the features previously described by each scanner type. Note how Portable Laser type scanners score the highest in a variety of features and scanning benefits.
| Scanner Type | |||||
|---|---|---|---|---|---|
| Scanner Benefits | CMM | Time of Flight | Structured Light | Portable Laser - Triangulation | Computed tomology (CT) |
| High tolerance accuracy | |||||
| Data acquisition speed | |||||
| Long distant measurements | |||||
| Setup time & portability | |||||
| Freedom of movement around subject | |||||
| Versatility of scan subject types | |||||
| Self positioning (no targeting) | * | ||||
| Passive scan - internal (x-ray) |
* Some laser scanners do not require positioning targets, while some do.
What does it all mean?
Certainly there are a lot of features and technical verbiage used to define the various 3D scanners that are available on the market. However, my goal in this post was to define the major scanner types and then explain the basic differences that make them advantageous or disadvantageous to their users. As with so many advancements in technology, scanning features are ever-evolving so it’s best to verify with whomever is selling their services that the results will prove beneficial.
What does the future of scanning behold? Most likely handheld scanners that have the onboard processing to negate the wired connection to a laptop or other processor necessary for computing the vast amount of data that scanning generates. With the ever increase of processing speed put in the palm of our hands with mobile devices, will we see the addition of aftermarket “snap on” lasers or additional cameras to scan objects at a moment’s notice? Not really that far fetched if you think about it. Whatever the case, 3D scanning technology is here now and the you should leverage it to make your projects more successful. I hope that this information will provide you with the ammunition you need to ask the right questions when you decide to begin.
Summary of what to remember about 3D scanning:
- Using the right type of scanner for the application is important. Using the wrong type can result in unusable or unreliable data that cost you valuable time & money.
- Handheld 3D laser scanning is the currently the most versatile type of scanning for the majority of inspection & reverse engineering applications.
- What is the project’s end goal? The results you need from your project should select the type of scanner to be used.
- Scanners are like many specialized tools. Selecting the right one for the job will insure your project success and ROI.
Are you ready to talk about an application? Still not sure which type of scanning is best for your project? Feel free to contact us and we would love to discuss your questions in person.

